

WordPress CRON lets you set up automatic tasks, such as updating your site, posting scheduled content, backing up your data, optimizing your database, sending emails, and more. WPeMatico uses WordPress CRON to import content from the RSS/Atom and XML feeds that you choose for your campaigns.
But WordPress CRON has a drawback: it only works when a user is logged in to the WordPress admin panel, so the automatic tasks depend on that.
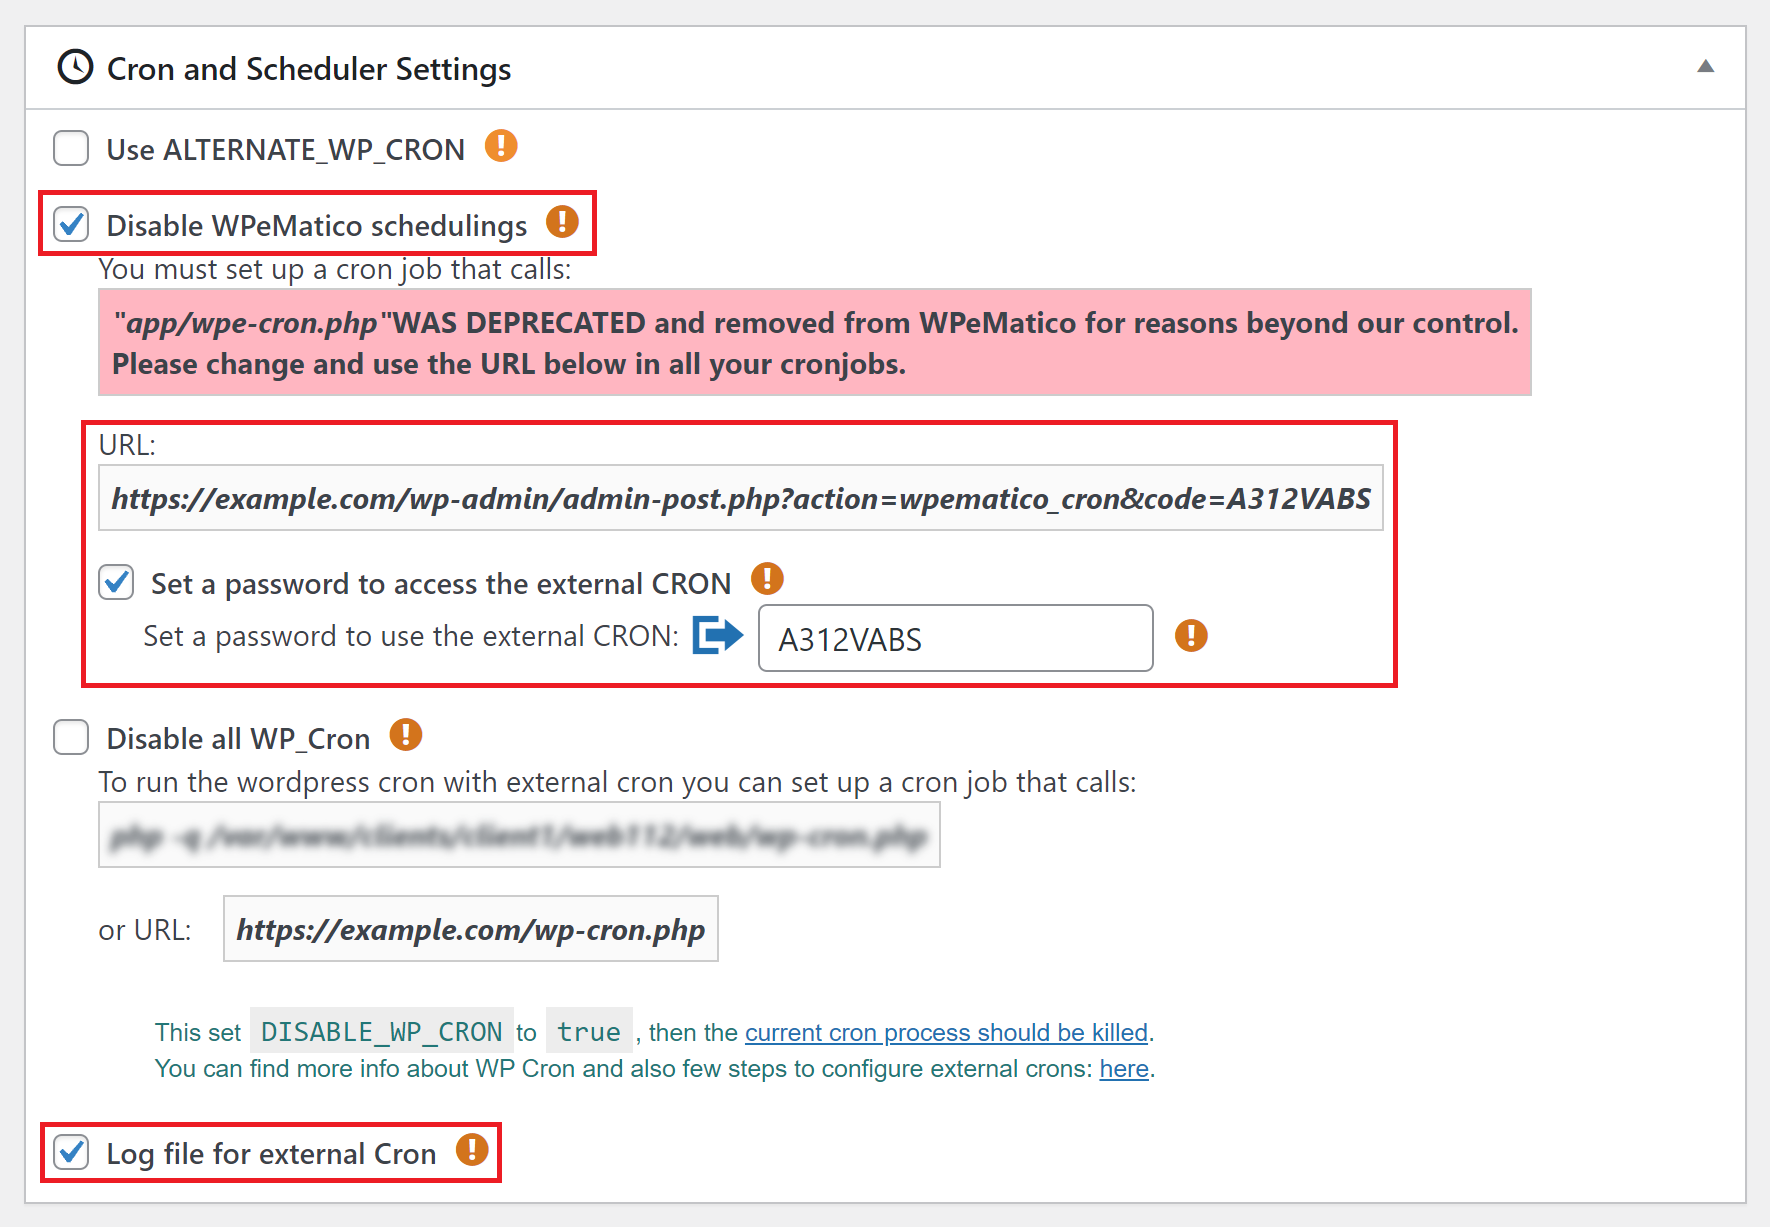
External CRON
A solution is to use an external CRON, which is a service that calls a specific URL at regular intervals, no matter how many visitors your website has. This way, you can decide how often and when to import content, and boost your website’s performance.
Configure it in 4 easy steps
First you must disable the WPeMatico CRON, you can do it from the settings screen from WPeMatico>Settings.
In the same settings screen is the URL that you must use for the external CRON. You can also add a password for added security if you wish.
Optionally, you can activate the “Log file for external Cron” option, this will allow to save the campaigns logs executed with the external CRON in the path /wp-content/uploads/%campaign title%.txt.log.
From the cPanel, add a new CRON job, configure the frequency as needed and in the “Command” field you must add the following command next to the URL provided by WPeMatico for your site:
wget -q -O - "https://example.com/wp-admin/admin-post.php?action=wpematico_cron&code=PASSWORD" >/dev/null 2>&1
That’s it! your external CRON will be ready to run according to the frequency, make sure to activate the campaigns you want to run..


