

Many feeds include more data than the title and the content: the author in <dc:creator>, an image in <media:content>, a price, a location… With the Custom Feed Tags of the Professional add-on you can read any tag of the feed items and use its value in the post template or in custom fields.
Enable the Feature
Go to WPeMatico → Settings, open the Professional tab, turn on Enable “Custom Feed Tags” feature and save the settings. This adds the Custom Feed Tags box to every campaign.
Create a Tag
- Open the feed in your browser and find the name of the tag you want inside each
<item>. - In Feed Tag, write that name, for example
dc:creator. - In Template, write the template tag you will use for it, between braces, for example
{creator}. - Click Add more for another tag, and Update to save the campaign.
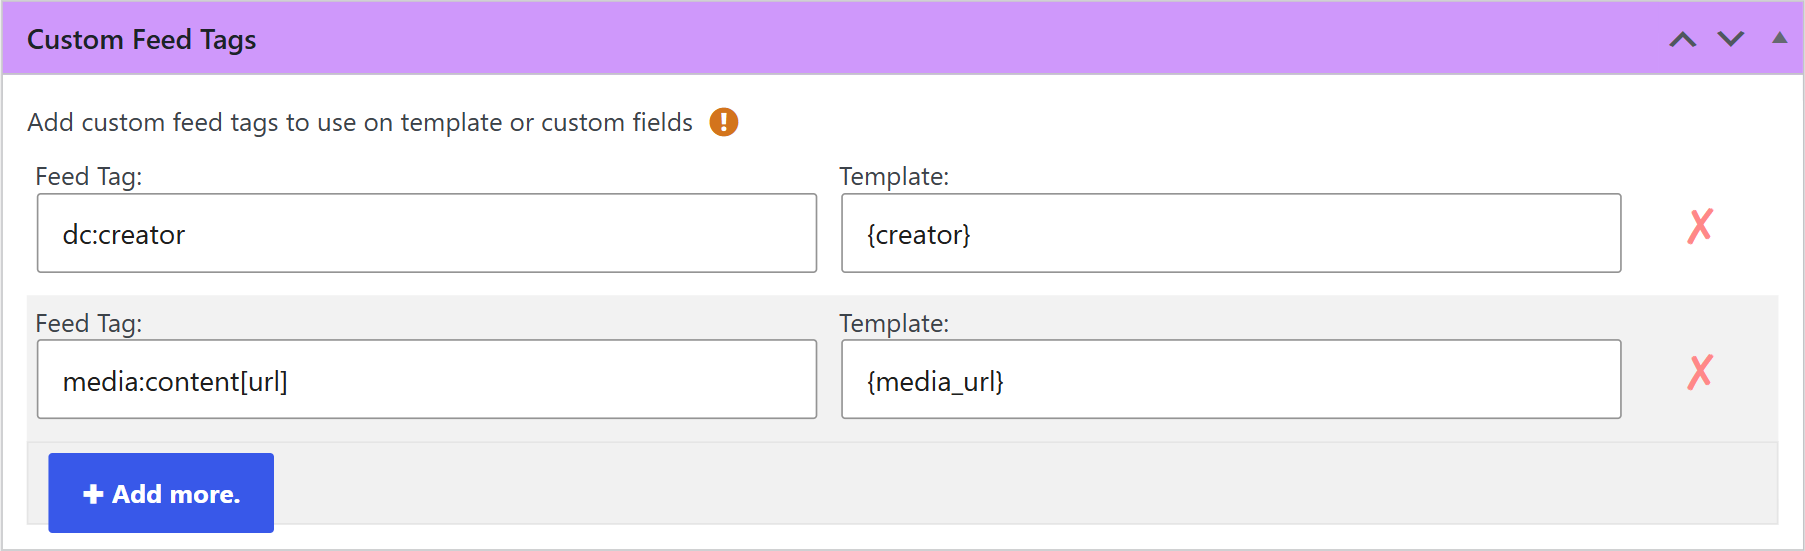
Now you can use {creator} in the Post Template box or in the value of a Custom Field, and it is replaced by the value of that tag in each item.
Write the Feed Tag
- With a namespace — write the prefix as it appears in the feed:
dc:creator,media:content. - A tag inside another — join them with
>:media:group>media:content. - An attribute — write it between brackets:
media:content[url]takes theurlof the tag. - When the tag is repeated — add its position between parentheses, starting at 0:
category(1)is the second one.
Related FAQs