

The Professional add-on lets you change the title of the posts a campaign creates: write your own title, keep the original one inside it, add a counter or cut it.
Enable the Feature
Go to WPeMatico → Settings, open the Professional tab and turn on Enable “Custom Title” feature. Then save the settings.
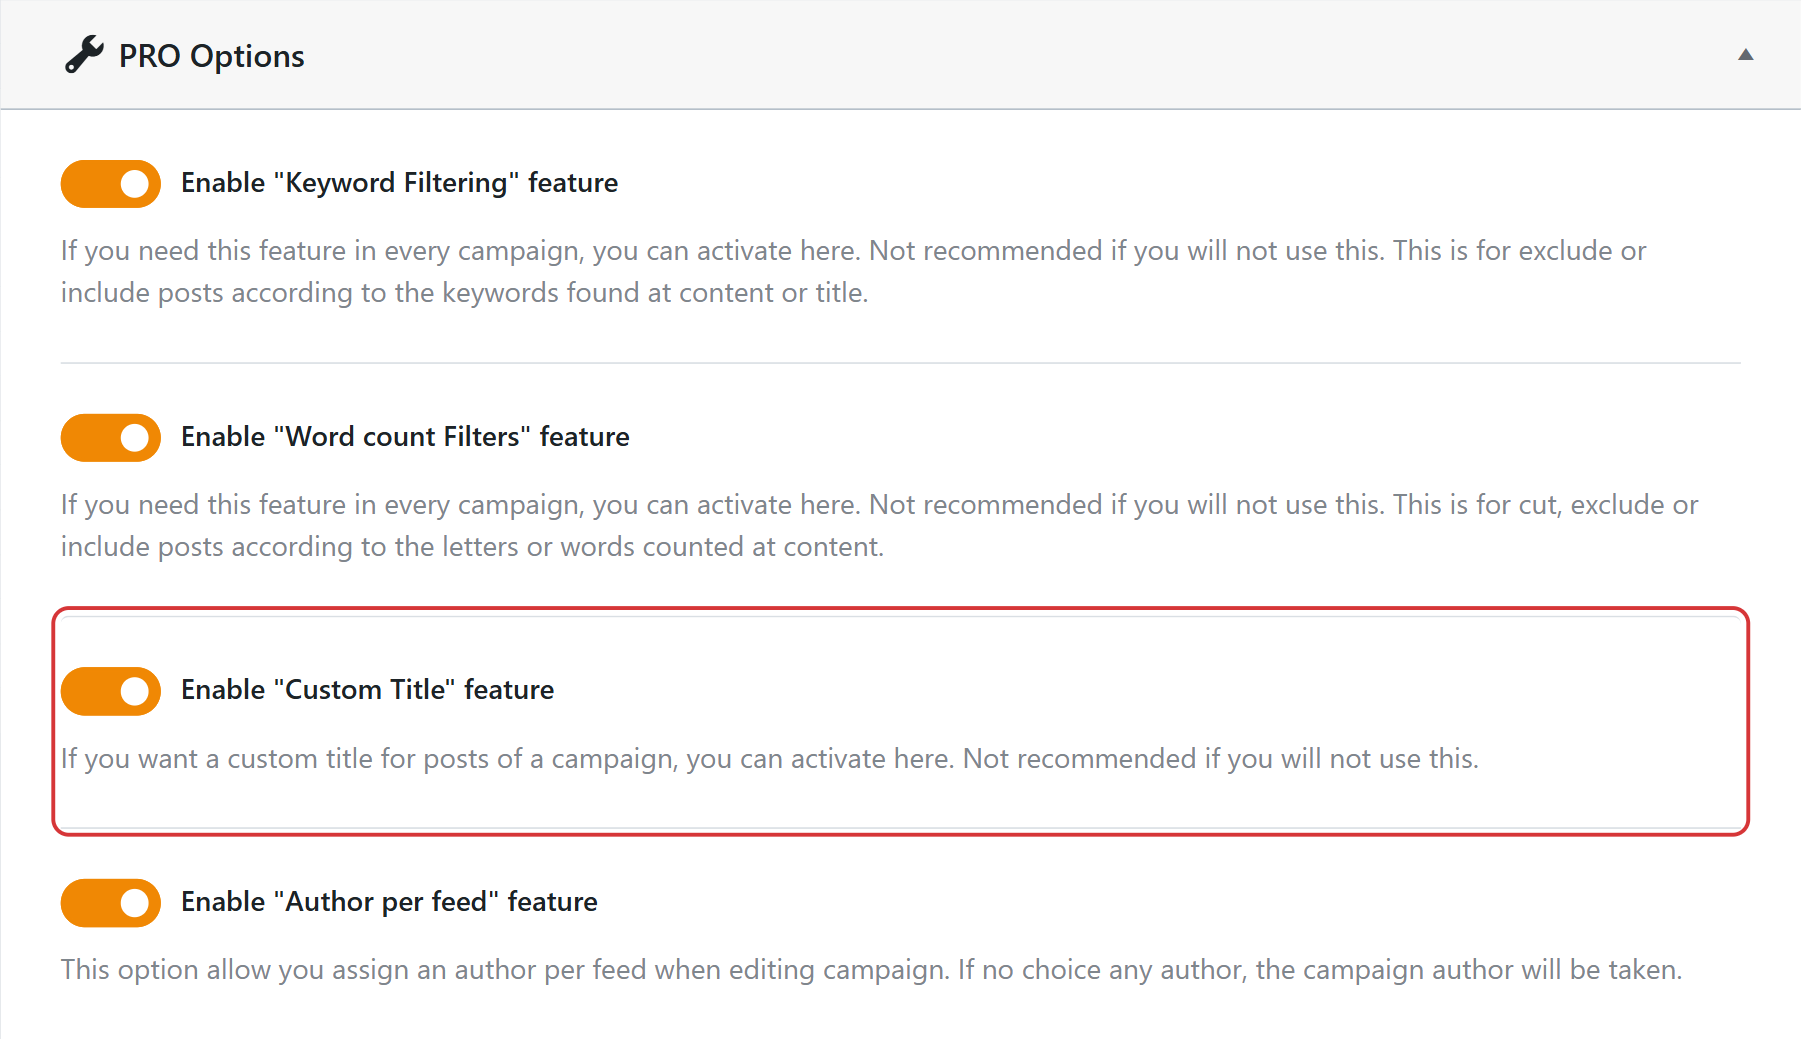
This adds the Custom Title Options box to every campaign.
Set a Custom Title in the Campaign
- Edit the campaign and, in the Custom Title Options box, check Enable Custom Post title.
- In Custom Title for every post, write the title. You can use {title}, replaced by the title of the feed item, and {counter}, replaced by a number. For example:
New Post: {title}. - To number the posts, check Add counter to Post title and choose the minimum digits and the next number. If you don’t use {counter} in the title, the number is added at the end.
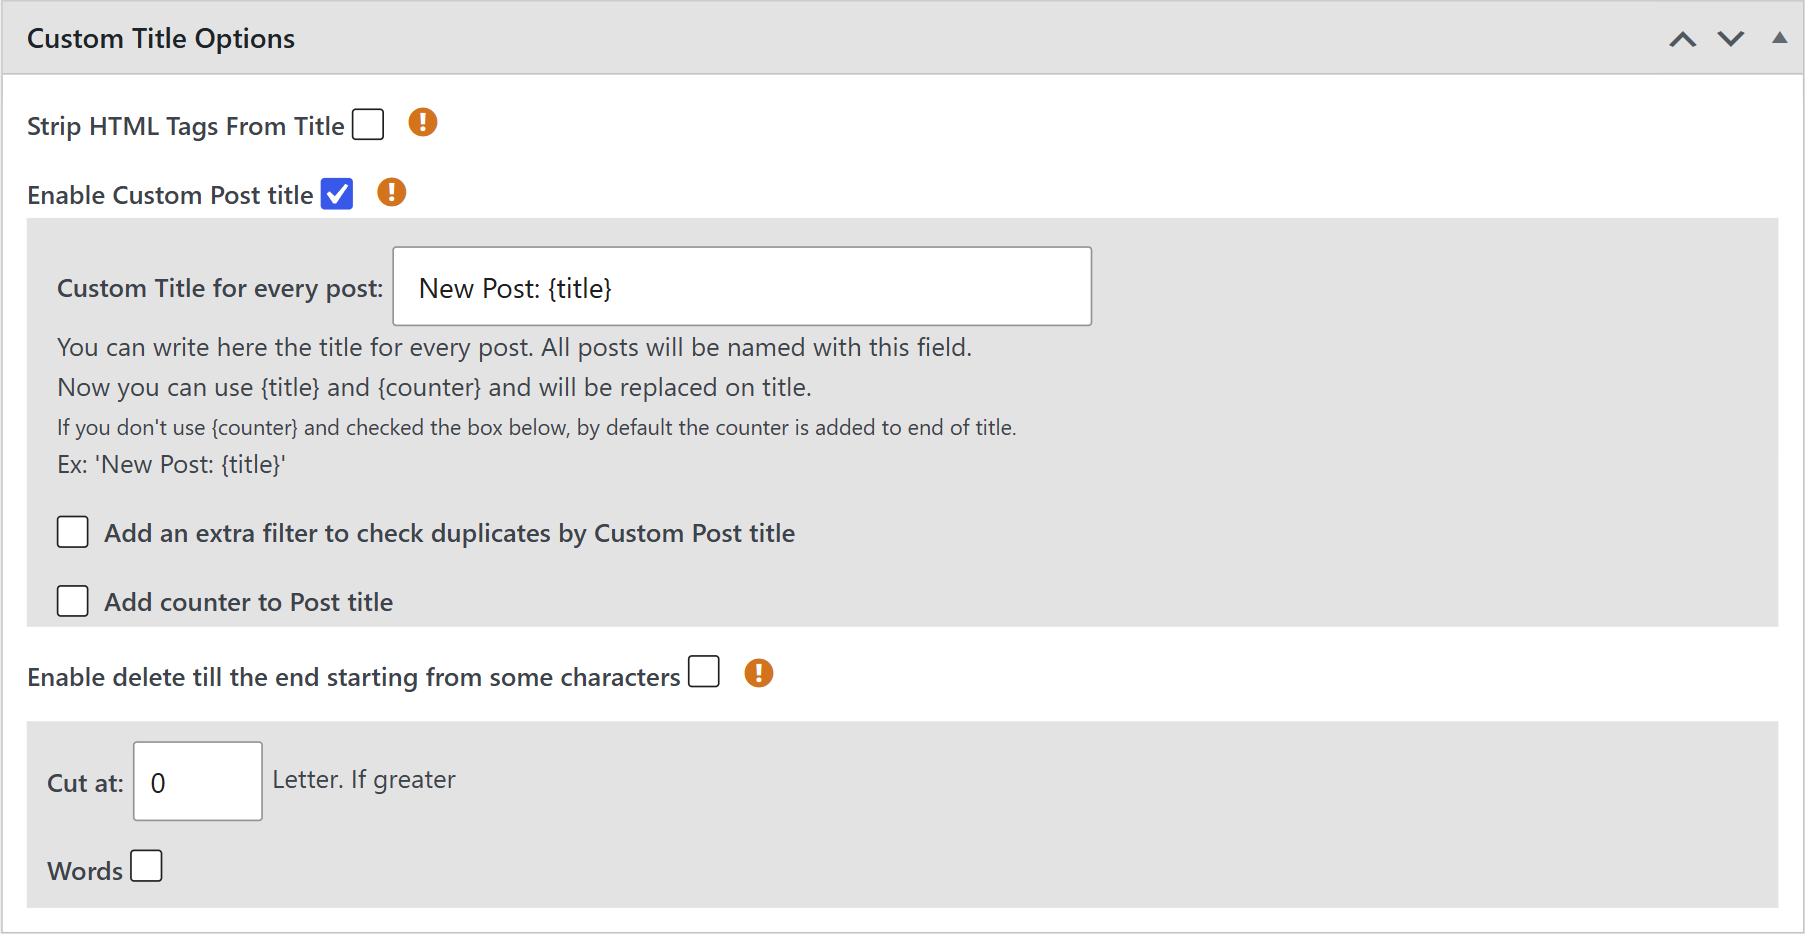
The same box also lets you strip the HTML tags of the title, delete the end of the title from some characters, and cut it at a number of letters or words.
Note: With a custom title, the duplicate control by title can’t find the posts already created. If you get duplicates, check Add an extra filter to check duplicates by Custom Post title.
Related FAQs