
Diagnostic Imaging is a plugin developed for use with WordPres for the administration of diagnostics by image and radiology…
It allows the management and loading of studies carried out by an institute or radiological studies center. This can manage the professionals of the area who work with the center and give them authorization to access to see, manage and download the results of the studies of their clients and referrals. By being online, they can do it through the internet in their own offices without the limits of having a closed local system.
In the system there are two fundamental roles for the operation of the same, the first role is Supervisor, which will have the privileges of managing patients, professionals and diagnostics. This role would be the supervisor given by the institute with access to all the data of the system.
In this article we will explain how to use the Diagnostic Imaging plugin through examples. For this we begin with the role of Supervisor to create a new patient that will be assigned to a professional who will be responsible for carrying the corresponding diagnosis.
Configuration
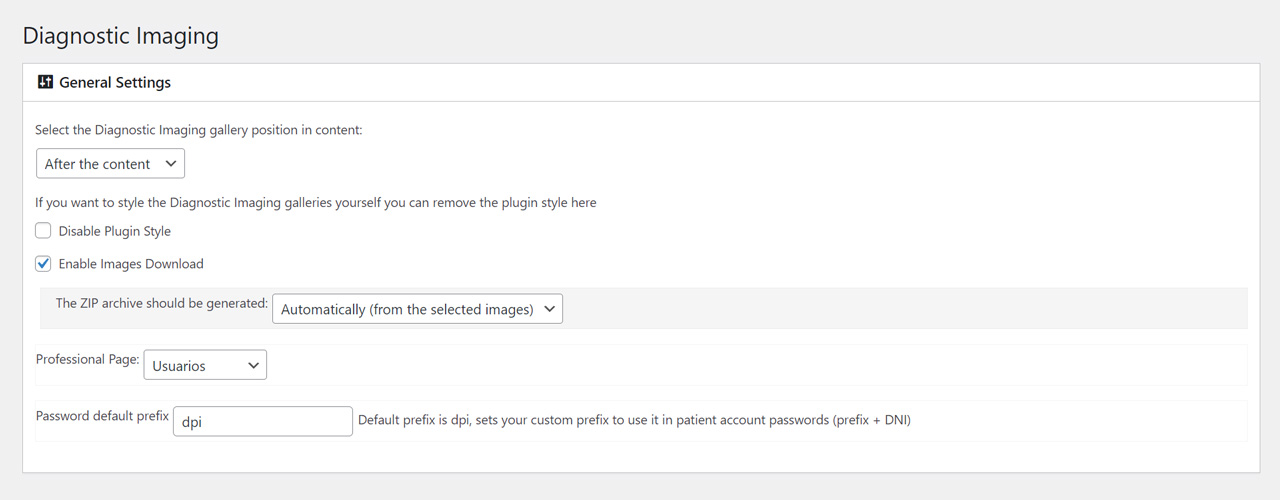
To access the plugin configuration we must place ourselves in the side menu and then locate in Settings>Diagnostic Imaging.
Once inside the configuration we can choose between a series of options that will be fundamental for the operation of the plugin. Among the options of General settings are those of positioning the images of the gallery, enabling the download of the images, choosing between automatically or manually generating the .zip file of the images, deactivating the style of the plugin and set a prefix for patient passwords.
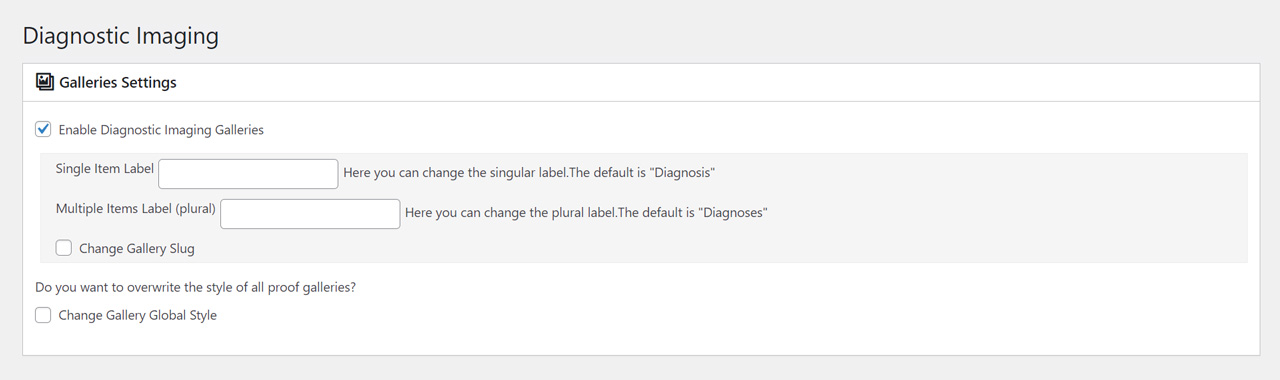
In galleries settings you can choose between activating or deactivating the gallery, assigning a singular and plural name, changing the default styles of the gallery, including the size of the images and the size of the columns.
Supervisor Role
1.- Creating a new patient:
It is necessary to place us in the side menu that is in the WordPress administration panel, we locate the link “Patients” and click on it, once inside we must click on “Add new” to create a new patient, in the following screen is a form where we must load the patient’s data.
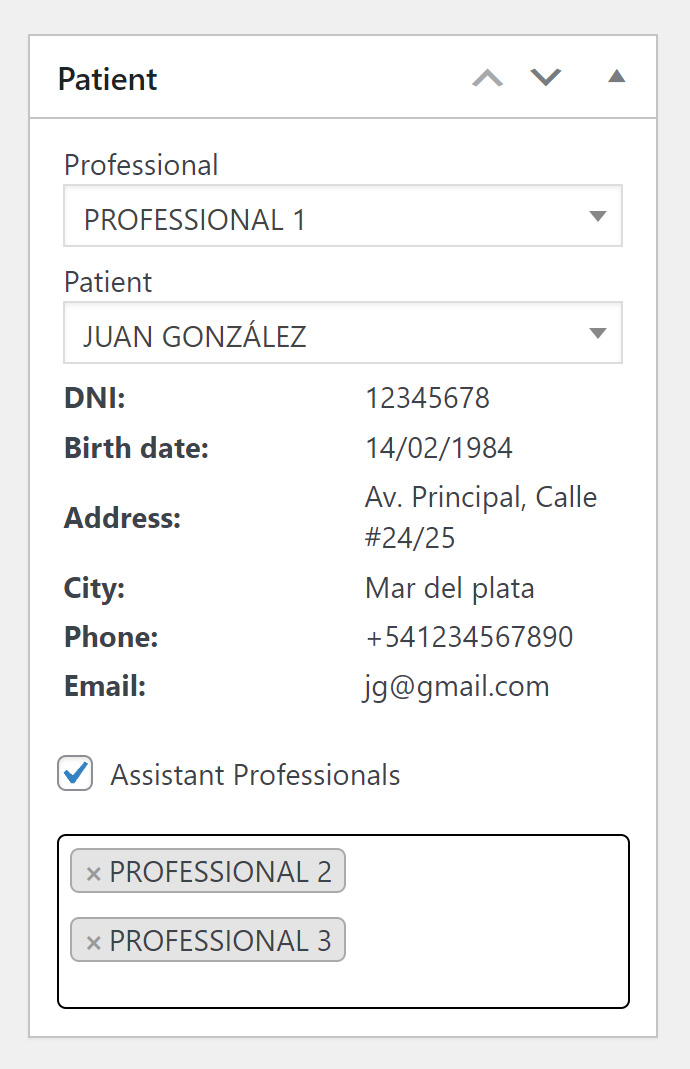
After loading the patient’s data, we can add a profile image to further reinforce the patient’s description. During the registration process is very important the assignment of the professional who will be responsible for carrying the diagnosis of that patient, we can assign this from the “Professional” section that is in the form.
In addition, if the patient is a minor, you can assign a tutor or parent patient previously registered.
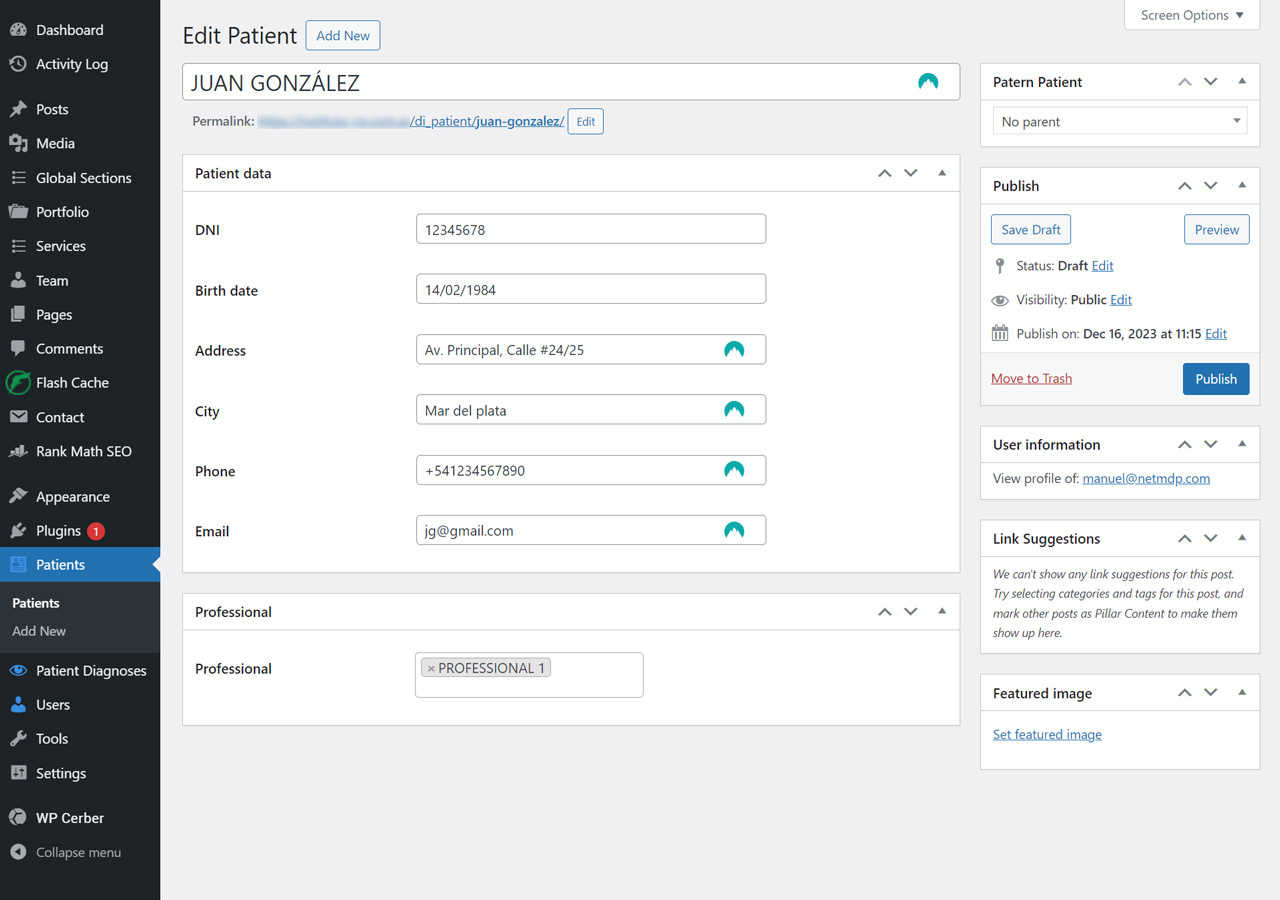
Once all the data has been loaded and assigned to the professional, we click on the Publish button to save the changes, in this way we can register a patient and assign it to the corresponding professional.
2.- Loading a diagnosis:
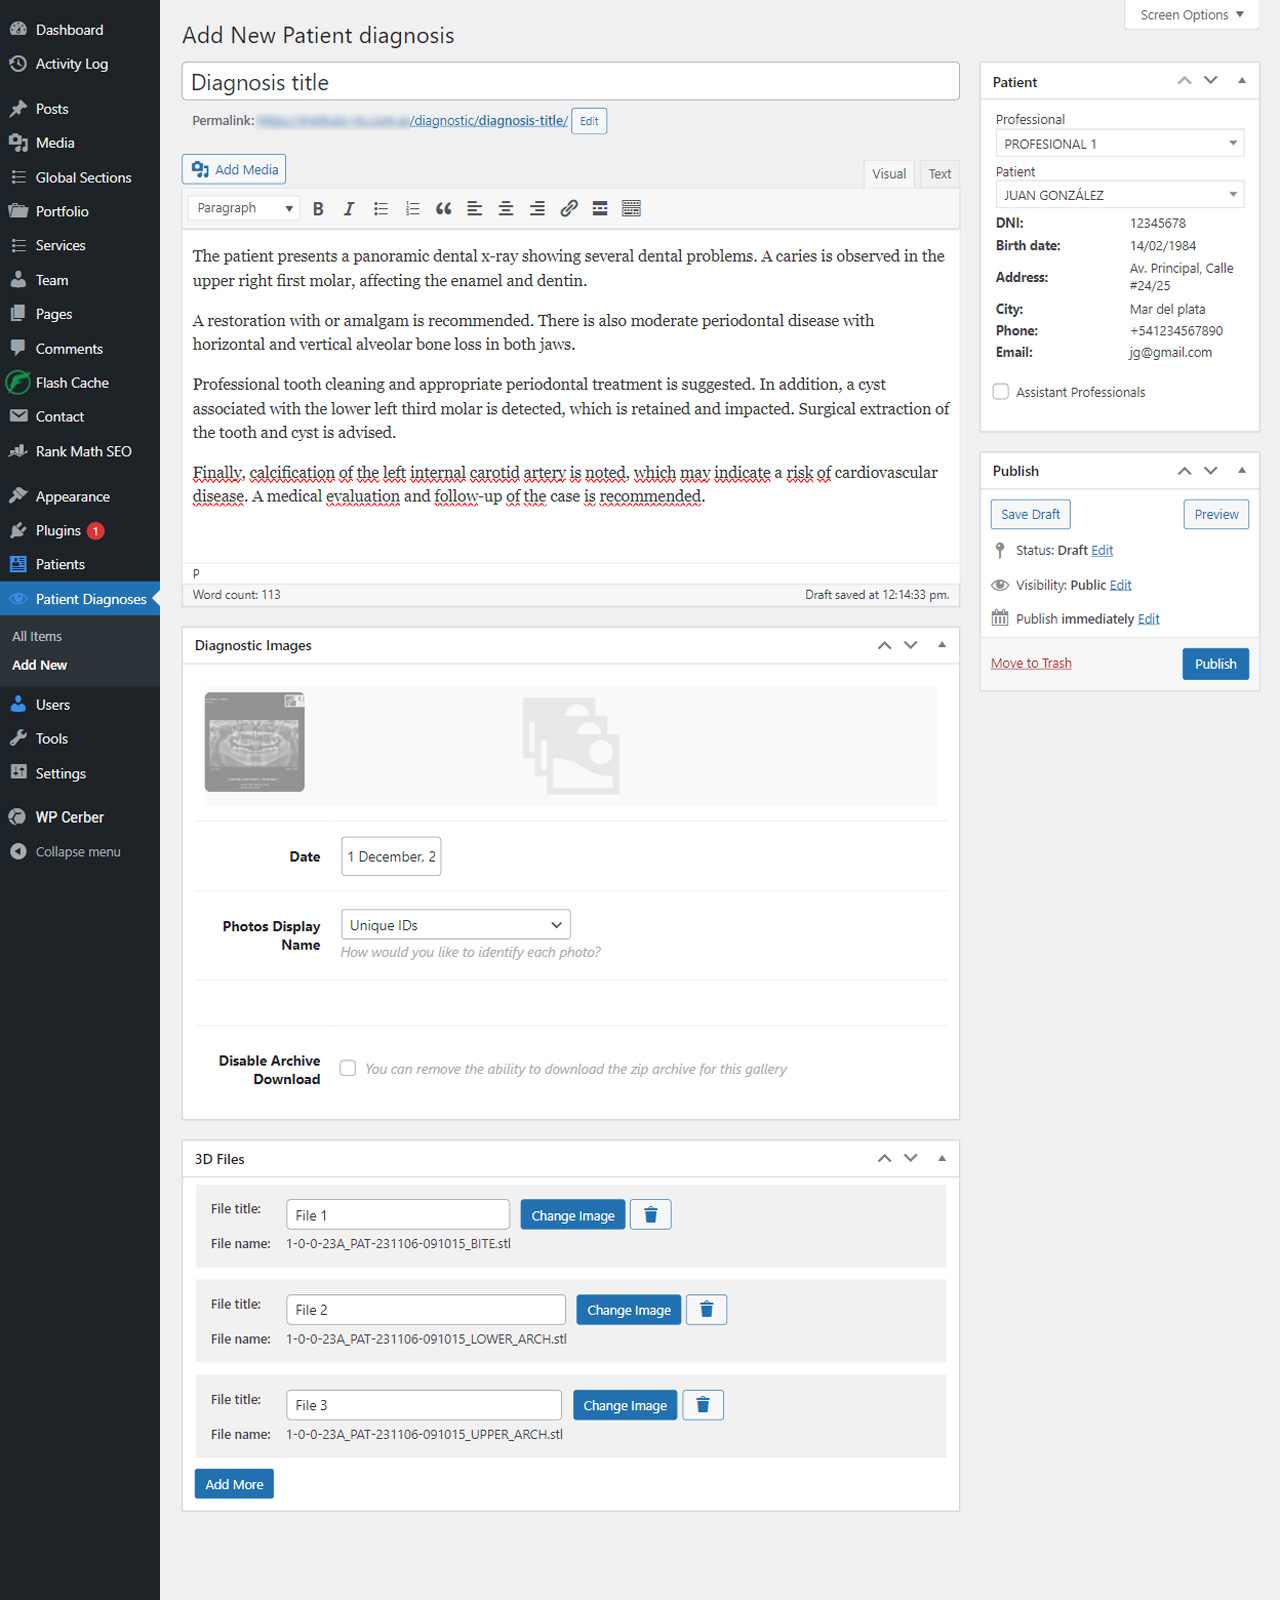
The second step is to create a new diagnosis of the patient according to the data obtained in the consultation, for this we go to the menu and click on the link “Patient Diagnostics” and once there we click on “Add new” then we will see the next screen in which we will load the diagnostic information.
On the left side of this form you can see a section called “Patient” where we will select the patient who has been diagnosed, once searched we will see all your contact information.
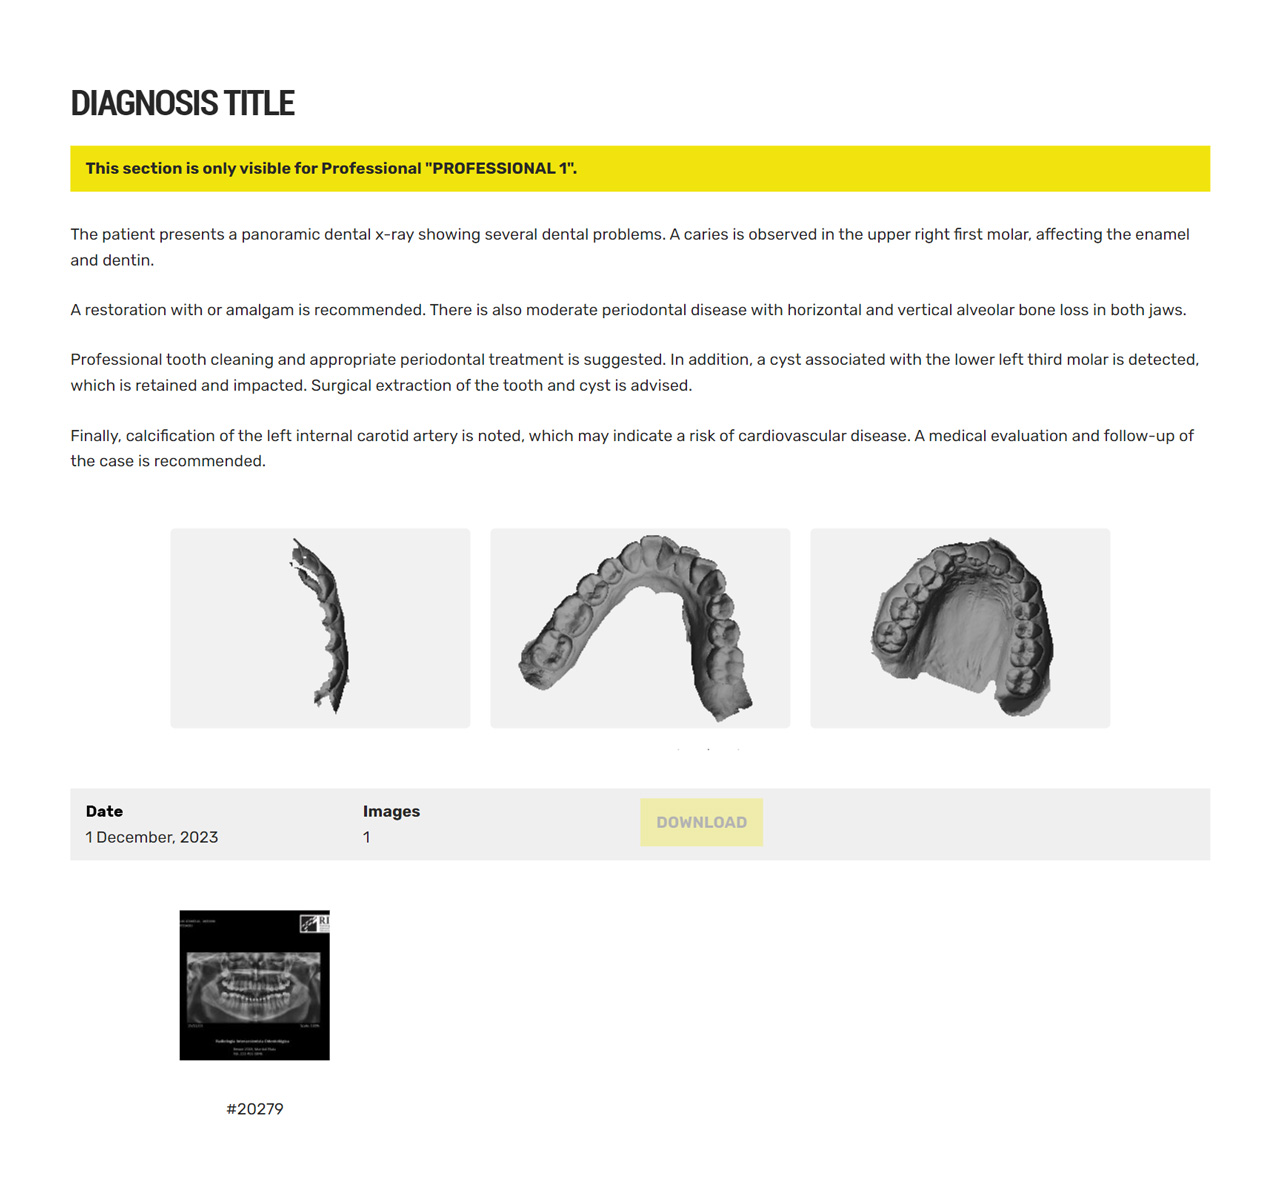
Through this form we can create a diagnosis by placing its title and description, as well as creating a gallery of images of the respective diagnosis, adding the images obtained from it.
Below the image gallery we see other fields, one of them is the diagnosis date, and the next field File .zip allows us to upload a compressed file that contains the diagnostic images or generate it automatically, this depends on the configuration applied In Settigns, the professional will have access to said file and will be able to download it and see the images in better screen resolution.
Inside the diagnosis it is also possible to add 3D files in STL, OBJ and 3MF formats that can be visualized from the browser by the professional in charge.
3.- Working from the web:
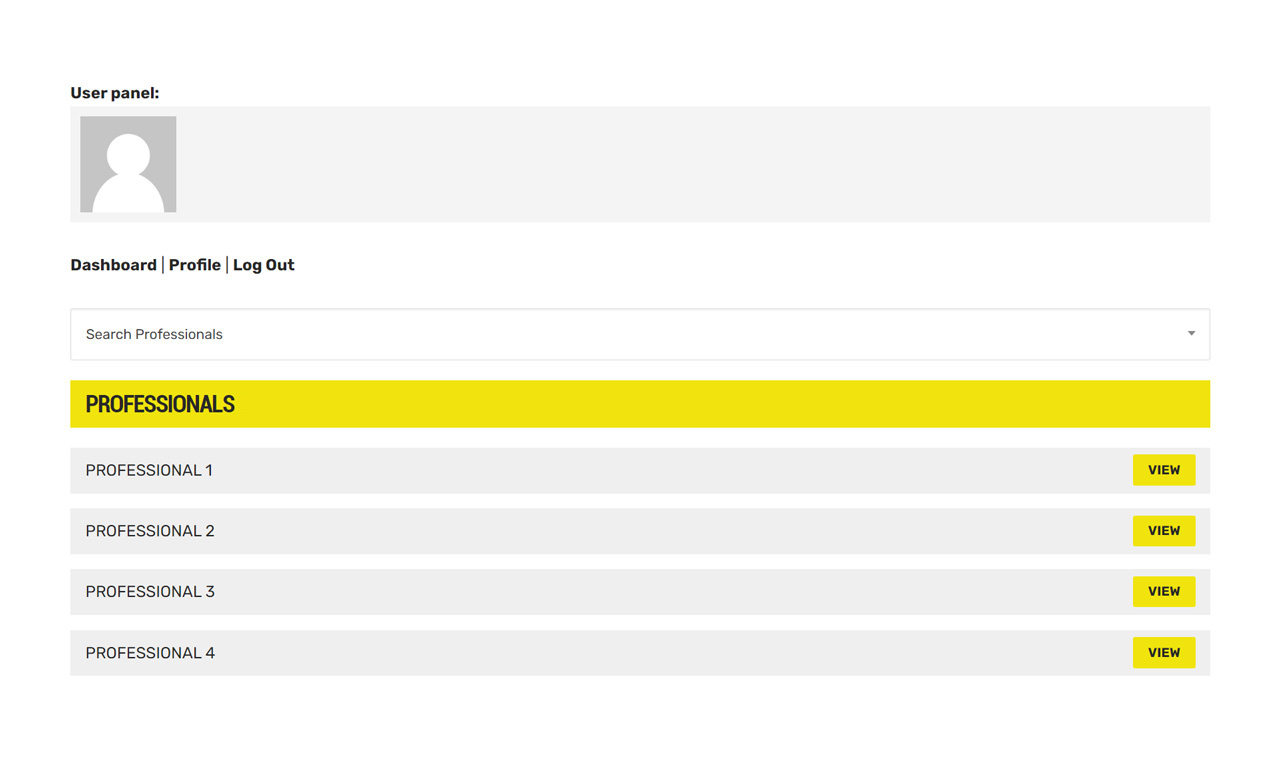
In this third step we will work with the Diagnostic Imaging plugin from the web, as you can see when entering the main page defined for the application, we are basically shown the user profile in session. In this section we can see a menu of three (3) new options “Desktop” which redirects us to the main menu of the application, “Profile” where we can make changes to user data and “Exit”.
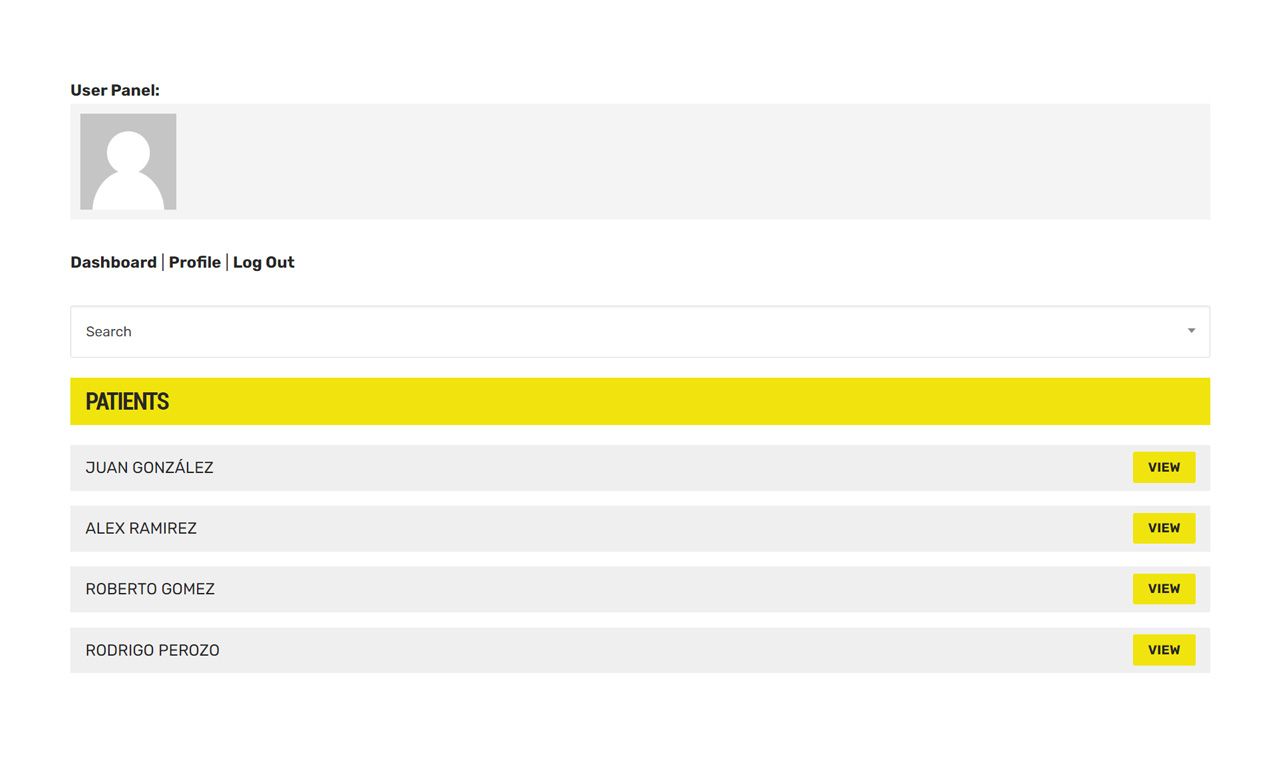
Below we have a search field with which we can filter professionals by their username or full name, from the list of professionals on the right side of each one there is an option called “View” which will allow us to view or list the patients that he has as shown in the following images.
As you can see in the following image, once you have clicked on the “View” option of the professional “PROFESSIONAL 1” a list of the patients that he has is expanded, a screen similar to the one at the beginning appears but with changes in the data since we are in the profile of the PROFESSIONAL 1, below shows us the search engine but in this case of “Patients”, specifically those of the selected professional.
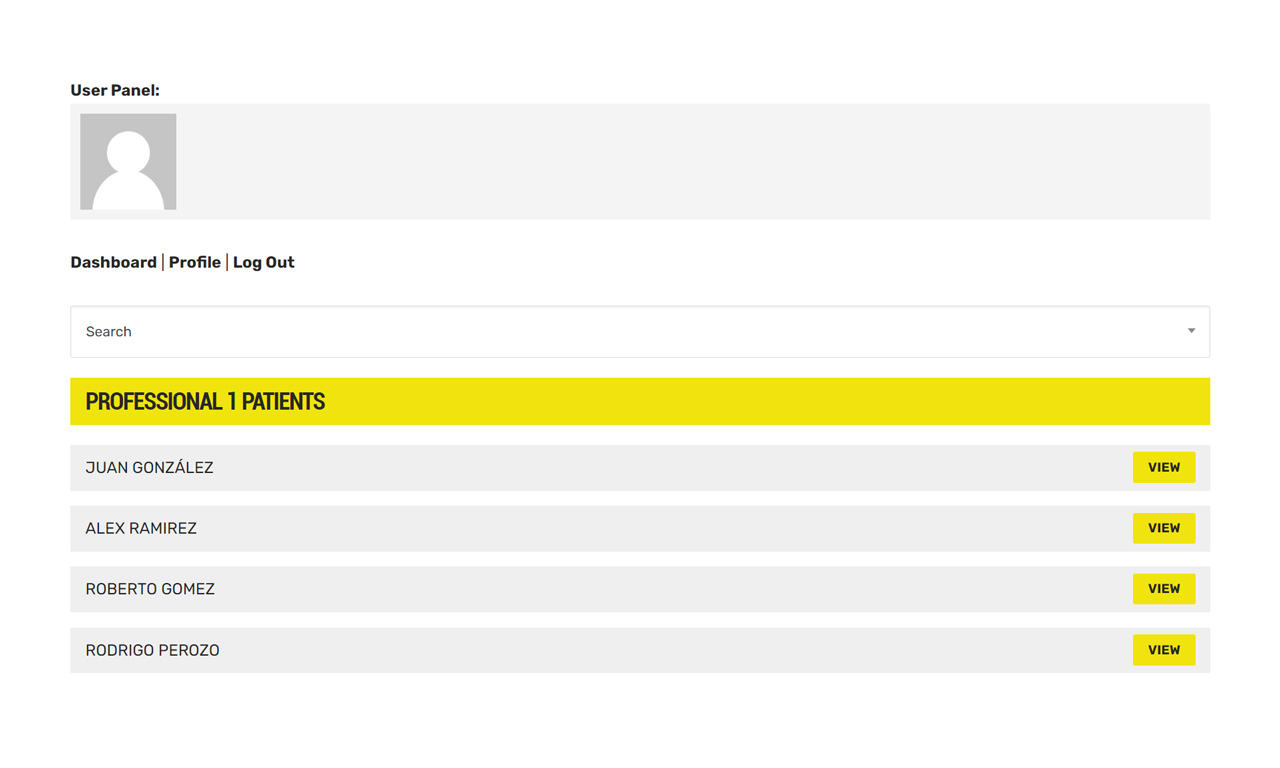
On the right side of the name of each patient is an option “View” which when clicked on it will take us to the data of the selected patient as well as show its corresponding list of diagnoses if it has it.
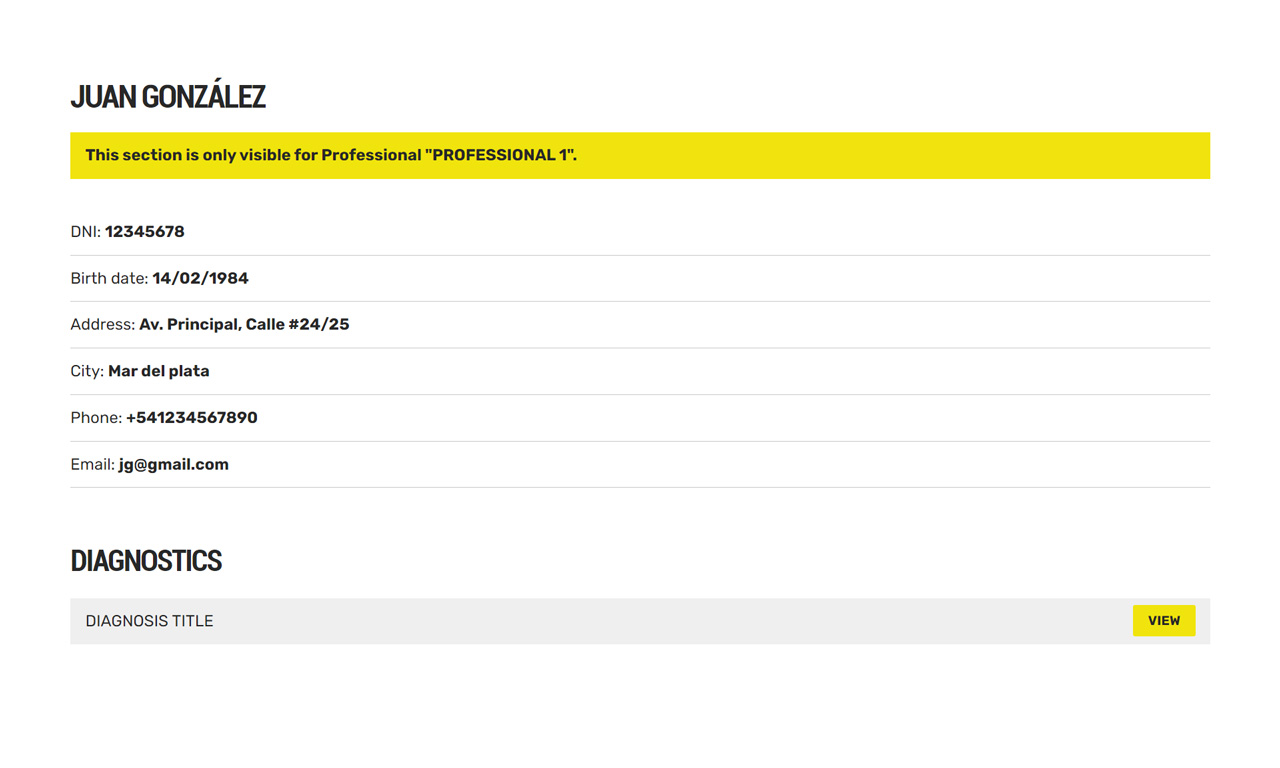
NOTE: The following section can only be seen by the patient or the professional doctor who made the diagnosis in order to have the security of following the private structure of a DOCTOR/PATIENT. If you do not have access to this information, the following message will appear: You do not have access to this page.
Professional Role
In this new part of the tutorial we will learn to manage the application as a professional doctor, we will be able to visualize the list of patients that the professional possesses and in turn, we can filter the patient from the search field in a more specific way.
Once the patient has been selected, we will have access to the patient’s information with all the basic data and mainly the diagnosis or diagnoses that exist between the professional and the patient.
In the previous image you can see the list of diagnoses that the patient has with the professional who is in session as well as a “View” option that has each of the diagnoses, once clicked on that option of any of the diagnoses of the patient will appear a screen where you can notice the details of the diagnosis such as the title, the date it was issued and of course the description of it.
Also you can see the images taken in this diagnosis with which the professional can give a better emphasis to the information given in the diagnosis, in the gallery is included a “Download” button on the right side which will allow us to download the images of the studies in .zip format and save it in the computer.