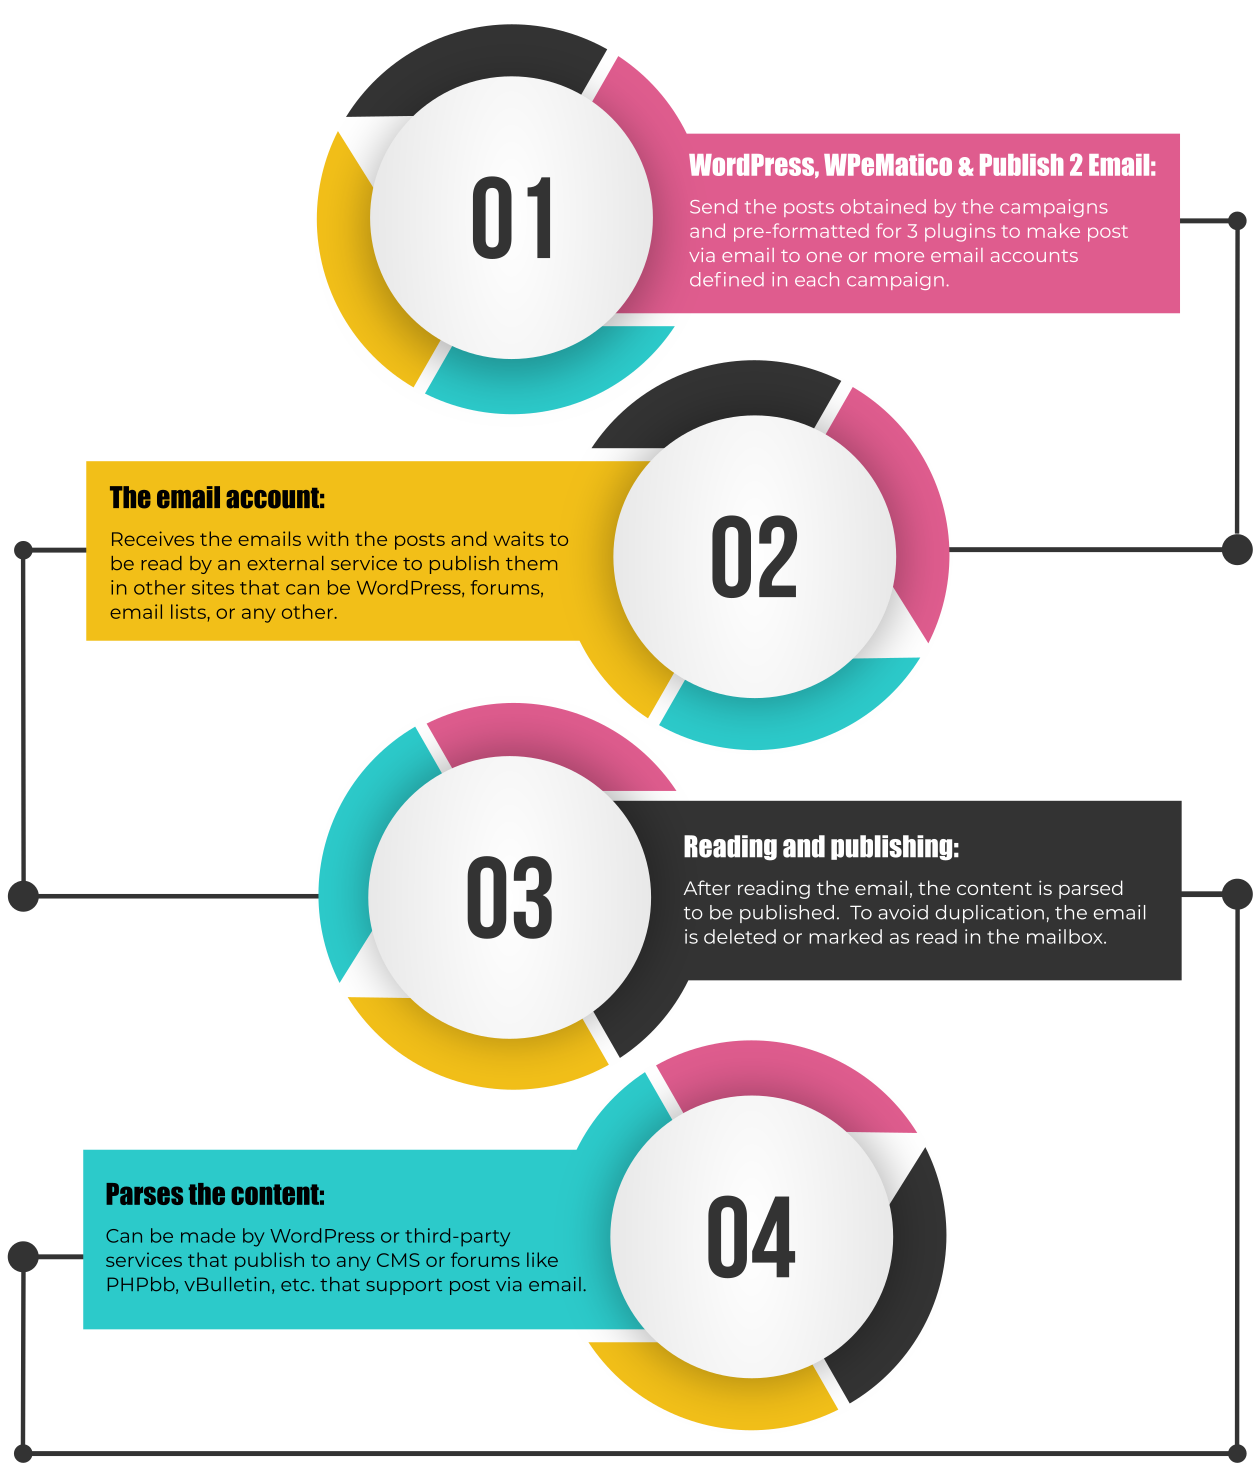

With the Publish 2 Email add-on, WPeMatico sends each item a campaign fetches to an email address, and whatever reads that mailbox publishes it. This way, one WPeMatico installation can feed many sites that don’t run WPeMatico at all.
1. Set the Default Addresses
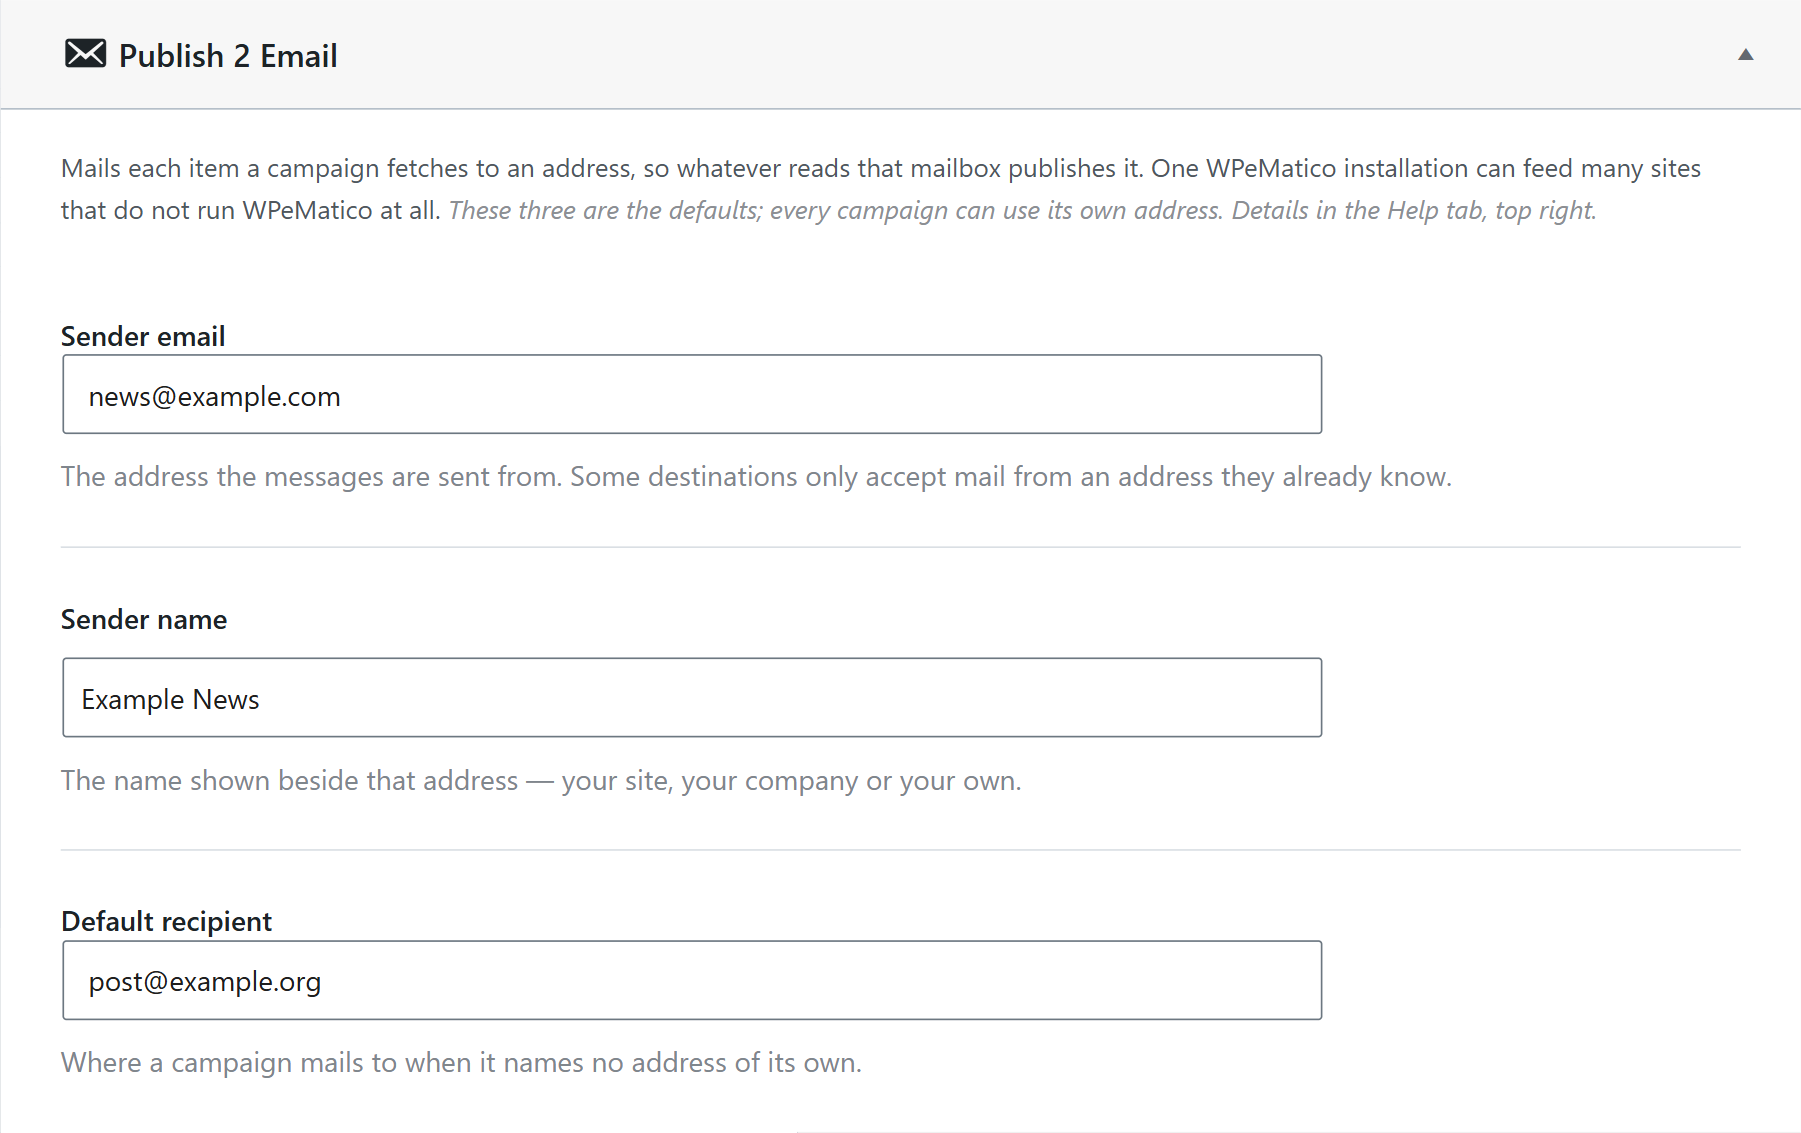
Go to WPeMatico → Settings and open the Publish 2 Email tab:
- Sender email and Sender name: who the messages come from. Some destinations only accept mail from an address they already know.
- Default recipient: where a campaign sends the posts when it doesn’t have an address of its own.
2. Activate It in the Campaign
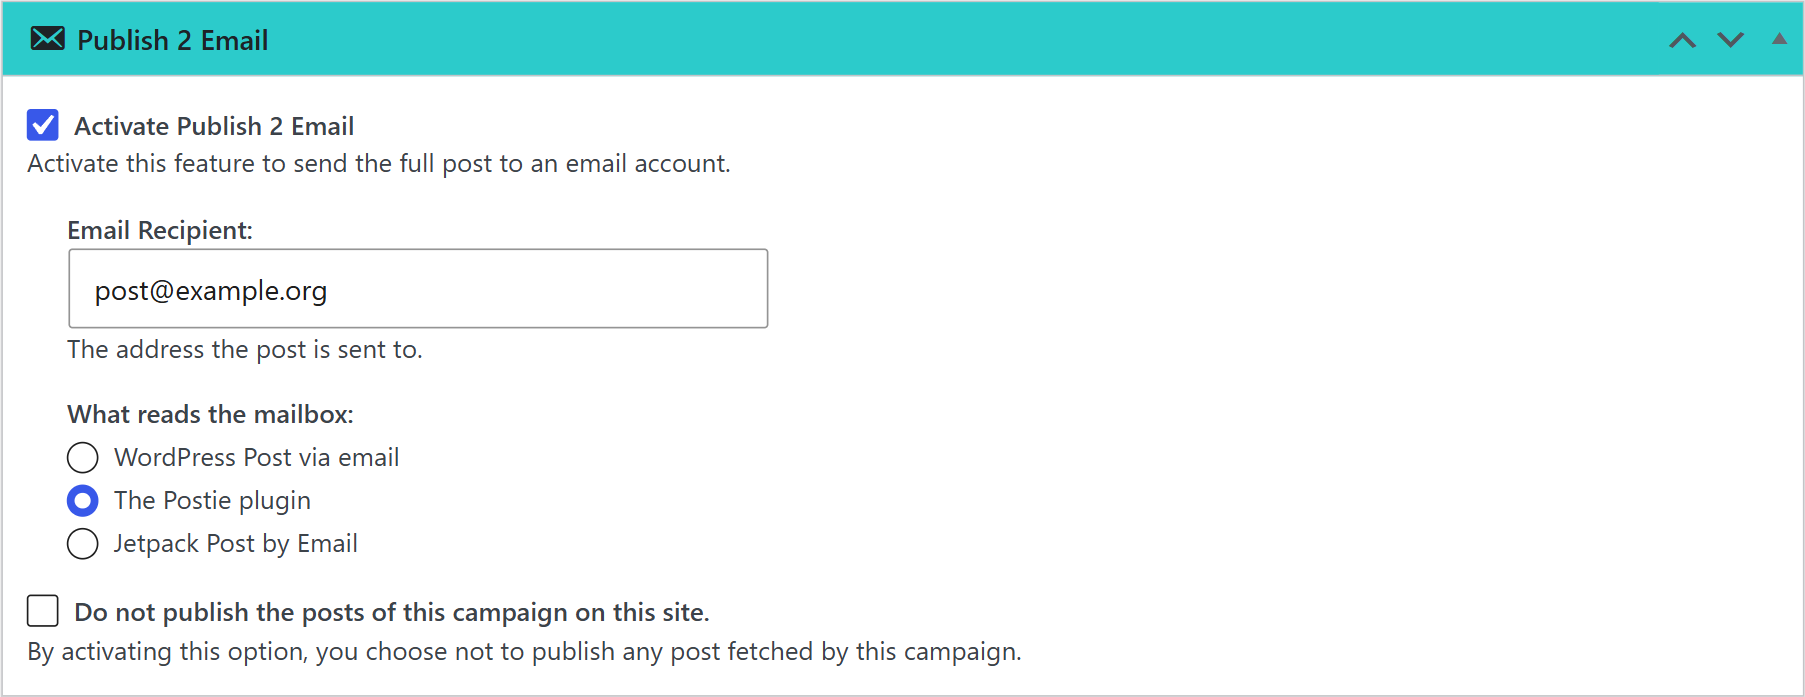
- Edit the campaign and, in the Publish 2 Email box, check Activate Publish 2 Email.
- In Email Recipient, write the address of the mailbox, or leave the default one.
- In What reads the mailbox, choose the service that will publish the emails on the other site: WordPress Post via email, The Postie plugin or Jetpack Post by Email.
Only Send, Don’t Publish Here
Check Do not publish the posts of this campaign on this site if you only want to send the posts by email. The items are not published on your own site, which also reduces the load on both servers.
How It Works