
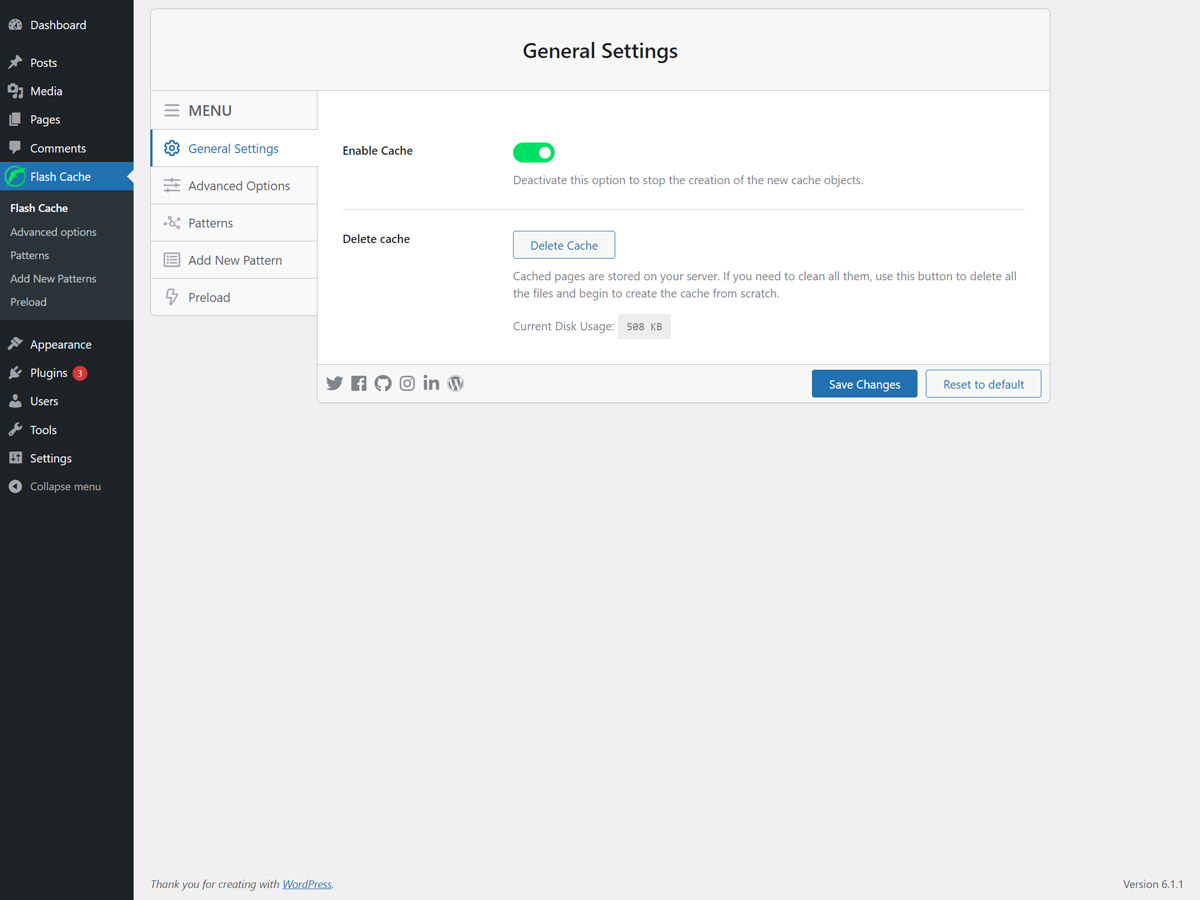
Flash Cache is a free cache plugin for WordPress by Etruel Developments. It saves a static copy of your pages and serves it to your visitors, so your site loads faster and your server works less. It doesn’t need WPeMatico or any other plugin.
- In your WordPress dashboard, go to Plugins → Add New.
- Search for Flash Cache, click Install Now and then Activate.
You can also download it from WordPress.org, and upload the flash-cache folder to /wp-content/plugins/ by FTP.
After you activate it, you see the new Flash Cache menu in your dashboard. All its pages have a menu on the left side: General Settings, Advanced options, Patterns, Add New Pattern and Preload.
The cache is off when you install the plugin. Go to Flash Cache → General Settings, set Enable Cache to On and click Save Changes.
When you save, Flash Cache adds its rules to the .htaccess file of your site (Apache and LiteSpeed) or to a nginx.conf file (nginx). If the rules of the file are not the same as the rules of Flash Cache, the plugin shows a notice so you can update them.
Note: Flash Cache needs pretty permalinks. If your permalinks are set to Plain, you can’t turn on the cache.
On this page you also have the Delete Cache button and the disk space that the cache uses now. See How to delete the Cache?
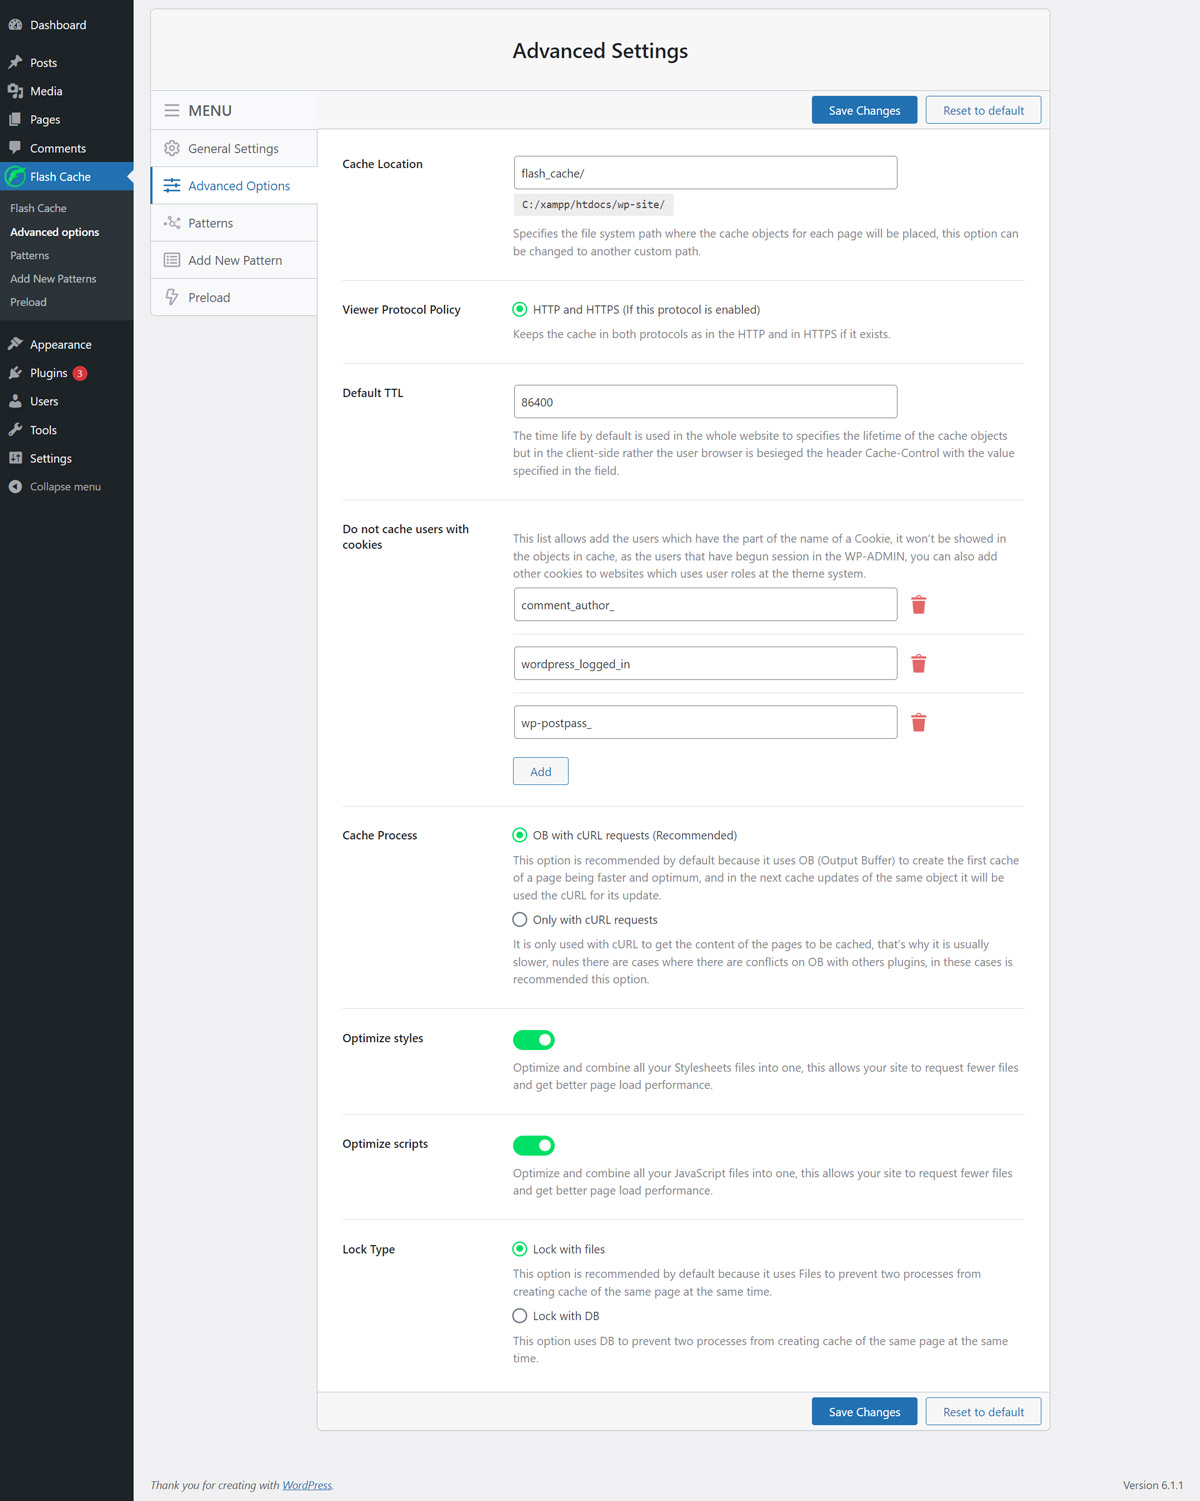
Go to Flash Cache → Advanced options. You don’t need to change anything here to start, but this is what each option does:
- Cache Location: the folder where Flash Cache saves the cache files. By default it’s
flash_cache/, in the root folder of your site. - Viewer Protocol Policy:
- HTTP and HTTPS: keeps the cache of both protocols, if your site uses both.
- Redirect HTTP to HTTPS: sends your visitors from HTTP to HTTPS. Use it only if your site has HTTPS. It also adds the
Strict-Transport-Securityheader, so the browsers go directly to HTTPS the next time.
- Default TTL: how long, in seconds, the browsers of your visitors keep a page before asking for it again. Flash Cache sends this value in the
Cache-Controlheader. The default is 86400 seconds (one day). - Do not cache users with cookies: visitors with a cookie whose name contains one of these texts always see the live page, not the cache. By default the list includes the logged-in users, the authors of comments and the visitors of password-protected posts. Add other cookies if your site shows different content to some users.
- Cache Process:
- OB with cURL requests (Recommended): creates the first cache of a page with the output buffer (OB), which is faster, and uses cURL for the next updates.
- Only with cURL requests: uses only cURL. It’s slower, so use it only if another plugin has conflicts with the output buffer.
- Disable Cache in Widgets: available in Flash Cache PRO.
- Optimize styles: combines all your stylesheets into one file, so the browser asks for fewer files.
- Optimize scripts: combines all your JavaScript files into one file. If something stops working, you can leave out the Inline scripts, the Theme JS files or the Plugins JS files. The SEO and social scripts are left out by default, because they are already optimized on their own servers. Turn on Include SEO & Social scripts in optimized file to include them.
- Lock Type: prevents two processes from creating the cache of the same page at the same time. Lock with files is the default. Choose Lock with DB to use the database.
Click Save Changes. If you want to go back to the default values, click Reset to default.